Getting started
Getting started
Before starting the tutorial please ensure that you have Unity, Flash and uniSWF all installed and open.
The following steps will take you through the simple process to get an asset from Flash into Unity using uniSWF. Once the asset has been converted into a Unity Asset you have a number of options of how to display and interact with the content.
MovieClipOverlayCameraBehaviour
Attaching a MovieClipOverlayCameraBehaviour component to the MainCamera enables you to attach swf assets directly to it, this makes it an ideal candidate for HUD's, 2d menus and interfaces. The next tutorial will take you through the steps to attach the button in this tutorial to the MainCamera using the MovieClipOverlayCameraBehaviour component. For more information check out the API ref MovieClipOverlayCameraBehaviour
MovieClipBehaviour
Attaching the MovieClipBehaviour to a GameObject in your scene is used for game sprites that have physics attached and react very much like a regular GameObject, for an example have a look at the Top down shooter. All of the playable assets are GameObjects with MovieClipBehaviour components attached. All of the UI is attached to the MainCamera using the MovieClipOverlayCameraBehaviour. For more information check out the API ref MovieClipBehaviour
InteractiveMovieClipBehaviour
Similar to the standard MovieClipBehaviour as above but with extra input functionality for Mouse and keyboard, this can be utilised in a number of ways. For example check out the Deep space demo which utilises the InteractiveMovieClipBehaviour. The menu is not attached to the Camera and instead is a GameObject in the Scene. For more information check out the API ref InteractiveMovieClipBehaviour
In this tutorial we are going to utilise the MovieClipBehaviour component to attach the Flash asset directly to a GameObject in the Unity Editor.
Step 1
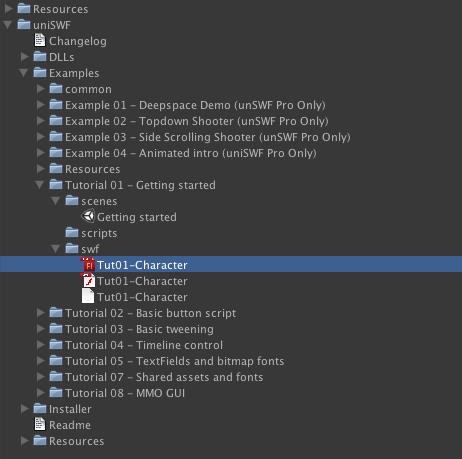
Expand the uniSWF folder in your project and locate the "Tutorial 01 Getting Started/swf/Tut01-Character.fla".
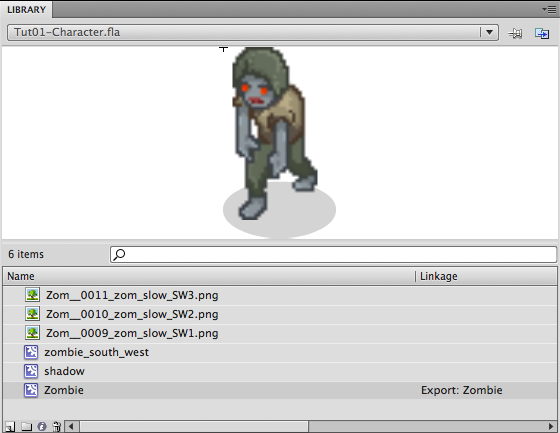
In Flash, open the fla and open the library. Here's a screenshot of the library. In order for uniSWF to convert useable assets to Unity, the required asset must have its linkage exported, notice the zombie movieclip linkage set to export.
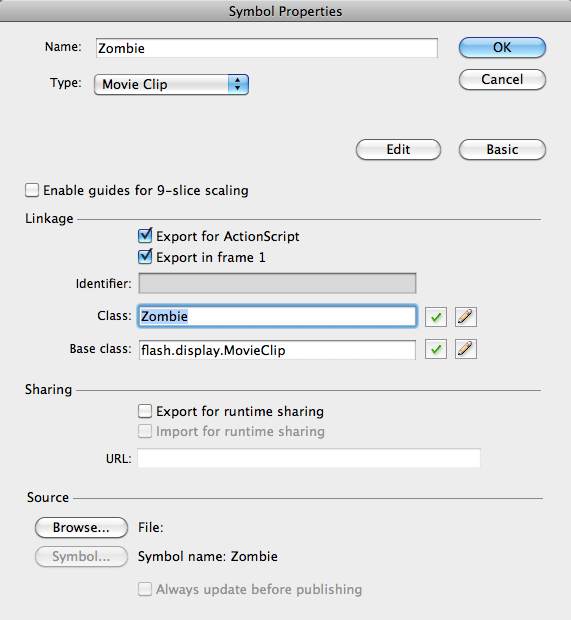
To set the linkage properties of an asset in Flash, right click on the asset and select "Properties..". On this panel make sure the "Export for ActionScript" option is selected
Step 2
Compile the Flash file and once completed, return back to Unity. From here uniSWF will automatically start to process the swf and translate it into a Unity asset. But first you will have to confirm the process via this confirmation panel.
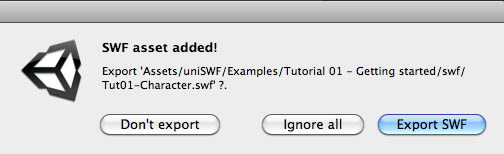
Click "Export SWF" to begin the conversion process. Once completed, you have successfully integrated the Flash Zombie asset within Unity.
Step 3
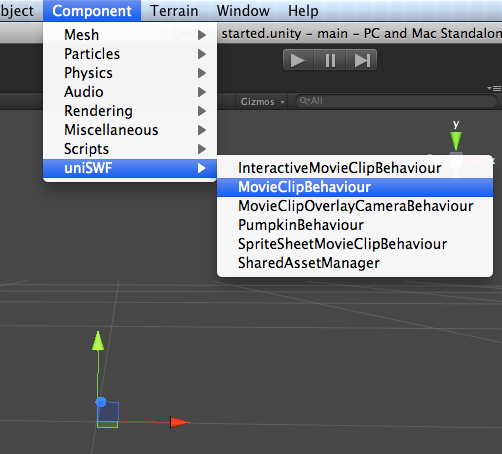
In Unity create an empty GameObject and attach the MovieClipBehaviour component to it. The components are applied from the "Component" option on the menu bar (see image).
Once the component is added to the GameObject, the GameObject's MovieClipBehaviour is made available in the Inspector.
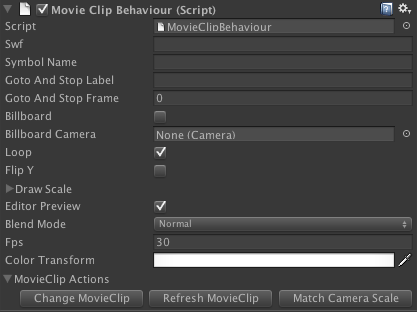
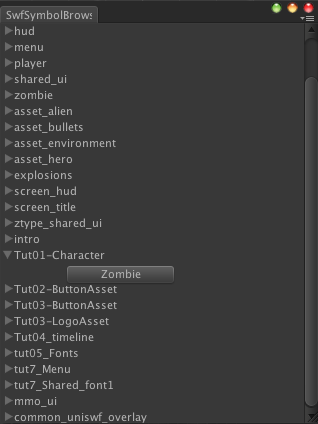
Click on "change Movieclip" and locate and select the Tutorial 1 Zombie asset from the Swf Symbol Browser.
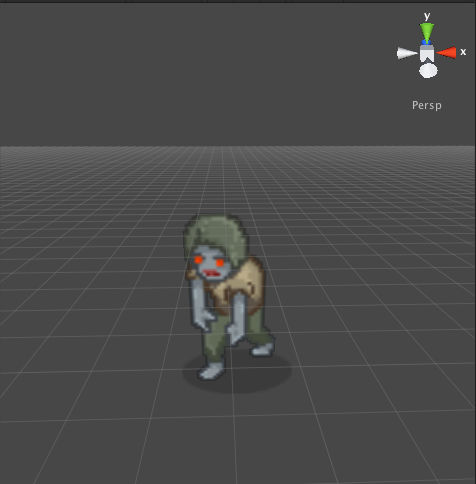
The MovieClipBehaviour is now referencing the Zombie Asset and is now visible in the Unity editor.
Finally, on the MovieClipBehaviour inspector click on the Match Camera Scale button to maintain 1:1 aspect ratio.
