Dynamic UI
Dynamic UI
Before attempting this tutorial please have uniSWF added to your current unity project.
Step 1
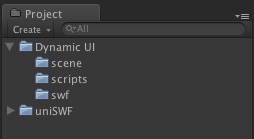
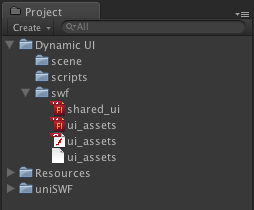
In your unity project create a folder called "Dynamic UI". Within the folder the following folders, "scenes", "scripts" and "swf" folder. This will be the file structure this tutorial.
Step 2
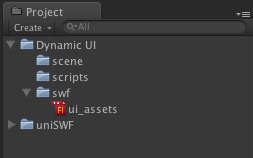
In flash create a new fla file called "ui_assets". Save the file into your "swf" folder in your unity project view.
Step 3
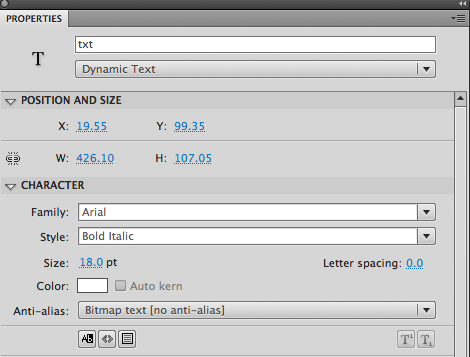
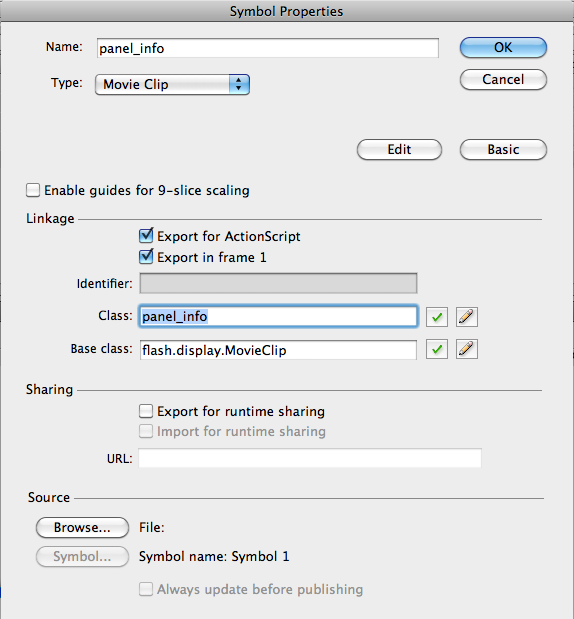
Import the supplied art assets from the "uniSWF/Examples/Tutorial 06 - Dynamic UI/swf/tut06_ui_assets.fla" folder. Now create a menu panel movieclip called "panel_info". Within it Create a dynamic text box called txt containing the font Arial, size 19 (this can be changed to any preferable font).
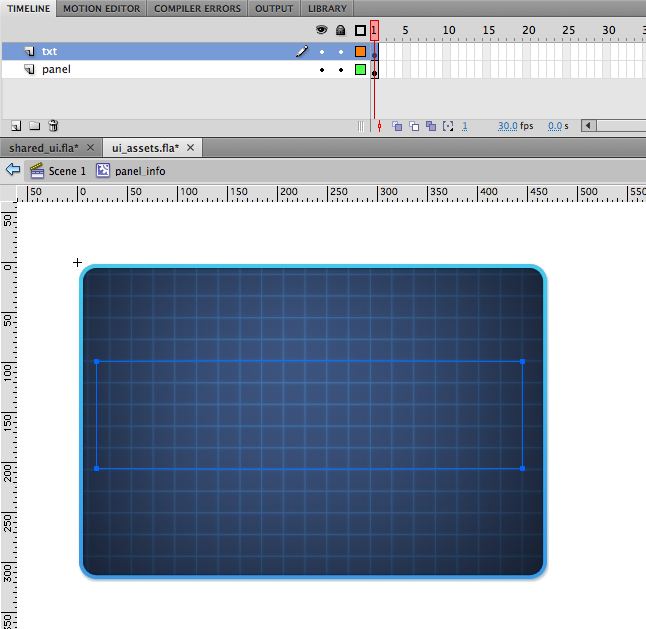
Below is an image of the dynamic text set up. Notice how Bitmap Fonts are selected. This is because the font is going to be rendered from another swf, more about this process in later steps.
Step 4
Make sure your movieclip library asset has the export linkage check box ticked and enabled. This is important as it enables you to access the movieclip in Unity.
Step 5
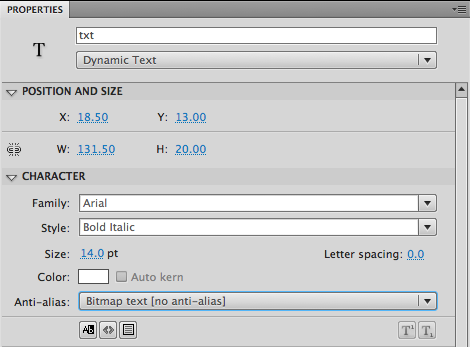
The next ui item we need to create is a generic button with a dynamic text field. Using the assets supplied, simply create a movieclip with 2 frames and call it "btn_generic". Add a dynamic textfield called "txt". Note: don't forget to export the linkage too!
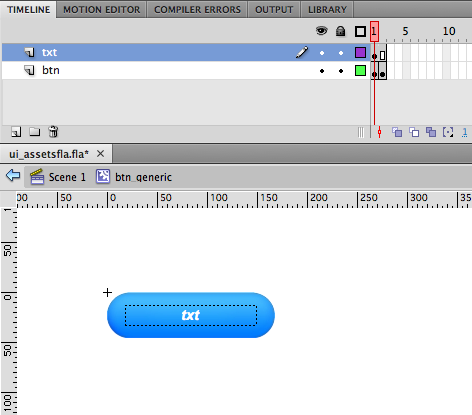
and as before with the "panel_info" dynamic textfield, we export the font as Bitmap Fonts
Step 6
Now compile / play the "ui_assets" fla and alt tab into Unity. uniSWF will now convert the assets into textures.
Step 7
Next create a "shared_ui" fla and save it into the "swf" folder within your Unity project. In flash create a movieclip and call it "Fonts". Make sure the export settings are checked. Now copy and paste both the txt fields used in the "ui_assets" fla. Ensure that you copy the txt field from the "info_panel" and the "btn_generic".
You should have something that looks like below (minus the helper notes)
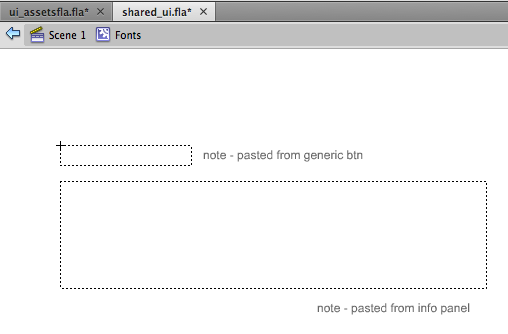
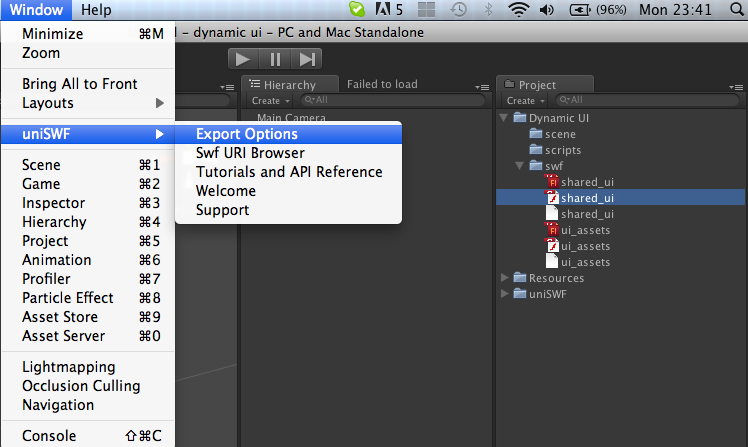
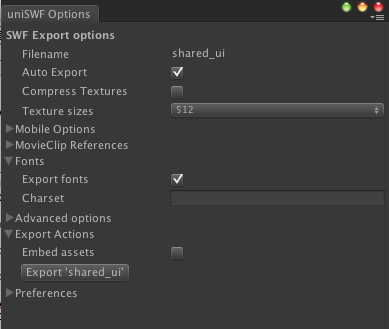
The "shared_ui" swf in this demo will only contain Fonts. This is a great way of optimising your larger projects as the fonts only need exporting once, not for every single swf that contains references to the fonts. Finally, go to the project view and click on the "ui_assets" swf in your unity project view, enter located "Dynamic UI / swf / ui_assets.swf" then click on the toolbar option "window / uniSWF / export options"
Expand the font option and check export fonts
Step 8
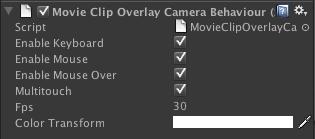
With all the asset production completed, the next task to do is to set up the camera. Attach the Movie Clip Overlay Camera Behaviour to the "Main Camera", (by first selecting the main camera in the "Hierarchy" and then selecting (Component - uniSWF - Movie Clip Overlay Camera Behaviour)). The uniSWF inspector will now be available when selecting the "Main Camera".
Step 9
To finish off camera preparation's, make sure the camera Projection is set to Orthographic
Step 10
Create an empty GameObject (GameObject / Create Empty) and name it "dynamic ui" . This will be attached to the script.
Step 11
Create a new JS file in your scripts folder called "DynamicUI". Copy and paste the code below.
#pragma strict

import pumpkin.events;
import pumpkin.display;
import System.Collections.Generic;

public class DynamicUI extends MonoBehaviour {

    var stage:Stage;
    var info_panel:MovieClip;
    var info:Dictionary.;

    function Awake() {

    }

    function Start () {

        /**
            Preload shares swf assets such as bitmap fonts an common ui components
        */

        MovieClip.preloadSWF( "Dynamic UI/swf/shared_ui.swf" );


        // set data
        info = new Dictionary.();
        info["MovieClips"] = "Create animations using the Flash® timeline and play/manipulate them directly in Unity";
        info["Display Lists"] = "Rich display list api for accessing display objects from UnityScript or C Sharp";
        info["2D Stage"] = "Ideal for Game UI, HUD's and even full featured 2D Games";
        info["Fonts"] = "Convert fonts with outer glows and gradients to bitmap fonts, comes with a full featured TextField API";
        info["3D MovieClips"] = "Great for character health bar overlays to augmented reality style user interfaces";


        // validate MovieClipOverlayCameraBehaivour ist attached to camera
        if( MovieClipOverlayCameraBehaviour.instance == null ) {
            Debug.LogError( "Failed to get MovieClipOverlayCameraBehaviour, ensure its attached to the MainCamera" );
            return;
        }


        // assign stage reference
        stage = MovieClipOverlayCameraBehaviour.instance.stage;


        // create menu clip
        info_panel =new MovieClip( "Dynamic UI/swf/ui_assets.swf:panel_info" ) ;
        info_panel.gotoAndStop(1);


        // screen helper to center menu
        ScreenUtils.center(stage,info_panel);
        info_panel.x = info_panel.x + 100;


        var counter:int;
        var btn_spacing:int = 15;

        for (var key in info) { // loop through data, create and populate btns

            // instantiate
            var btn:MovieClip =new MovieClip( "Dynamic UI/swf/ui_assets.swf:btn_generic" ) ;
            btn.gotoAndStop(1);

            // positioning
            btn.x = info_panel.x - 200;
            btn.y = info_panel.y + (counter * (btn.height + btn_spacing));

            // set key identifier as intance name
            btn.name = key.Key.ToString();

            // Text Field
            var btn_txt:TextField = btn.getChildByName.("txt");
            btn_txt.text = btn.name;

            // Mouse Events
            btn.addEventListener( MouseEvent.CLICK, onButtonClick);
            btn.addEventListener( MouseEvent.MOUSE_ENTER, onButtonEnter);
            btn.addEventListener( MouseEvent.MOUSE_LEAVE, onButtonLeave);
            stage.addChild(btn);

            counter++;
        }

        stage.addChild(info_panel);
    }


    /**
    * Show selected information on display panel
    */

    function displayInfo(str:String) {
        var info_panel_txt:TextField = info_panel.getChildByName.("txt");
        info_panel_txt.text = str;
    }


    /**
    *Button Actions
    */

    function onButtonClick(e:MouseEvent):void {
        var m:MovieClip = e.currentTarget as MovieClip;
        displayInfo(info[m.name]);
    }

    function onButtonEnter(e:MouseEvent):void {
        var m:MovieClip = e.currentTarget as MovieClip;
        m.gotoAndStop(2);
    }

    function onButtonLeave(e:MouseEvent):void {
        var m:MovieClip = e.currentTarget as MovieClip;
        m.gotoAndStop(1);
    }
}
The first line of interest is the following
MovieClip.preloadSWF( "Dynamic UI/swf/shared_ui.swf" );
This preloads the fonts we created earlier, making them available to any assets that utilise them,. In this case it's the "info_panel" textfield and "btn_generic" textfield located in the "ui_assets" swf. Even though the project is reasonably small, in a full game / app you may have many ui panels and swf asset.s By using the concept of shared assets, textures required are greatly reduced.
The next segment of code loops through the data in the Dictionary Array and dynamically attaches buttons to the stage (which resides on the MovieClipOverlayCameraBehaviour). Notice how the code used for positioning is using the "info_panel" movieclip cordinates to postition the buttons. Within this loop we also add MouseEvents to the buttons for interactivity.
var counter:int;
        var btn_spacing:int = 15;

        for (var key in info) { // loop through data, create and populate btns

            // instantiate
            var btn:MovieClip =new MovieClip( "Dynamic UI/swf/ui_assets.swf:btn_generic" ) ;
            btn.gotoAndStop(1);

            // positioning
            btn.x = info_panel.x - 200;
            btn.y = info_panel.y + (counter * (btn.height + btn_spacing));

            // set key identifier as intance name
            btn.name = key.Key.ToString();

            // Text Field
            var btn_txt:TextField = btn.getChildByName.("txt");
            btn_txt.text = btn.name;

            // Mouse Events
            btn.addEventListener( MouseEvent.CLICK, onButtonClick);
            btn.addEventListener( MouseEvent.MOUSE_ENTER, onButtonEnter);
            btn.addEventListener( MouseEvent.MOUSE_LEAVE, onButtonLeave);
            stage.addChild(btn);

            counter++;
        }
Each button instance name is set to the "Key" of the Dictionary Array as it cycles through the data. This is a great way of acquiring the data binder attached to a particular button the Key is set to. The following code listens for a click and extracts the name of the button instance.
function onButtonClick(e:MouseEvent):void {
    var m:MovieClip = e.currentTarget as MovieClip;
    displayInfo(info[m.name]);
}
The above function is casting the Mouse Events target to a movieclip and acquiring a handle to the movieclip name. This works in a similar way to AS3. After attaining the button's instance name it's passed to a function to render out the related data to the particular button.
Below we are acquiring a handle to the Textfield within the "info_panel" using the getChildByName method and assigning the function's parameters to the text property of the Textfield.
function displayInfo(str:String) {
    var info_panel_txt:TextField = info_panel.getChildByName("txt");
    info_panel_txt.text = str;
}
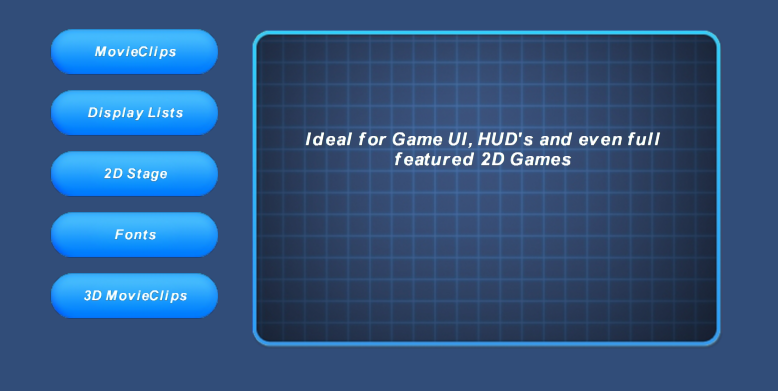
Step 11
Compile the Unity project and you should see some thing like this.